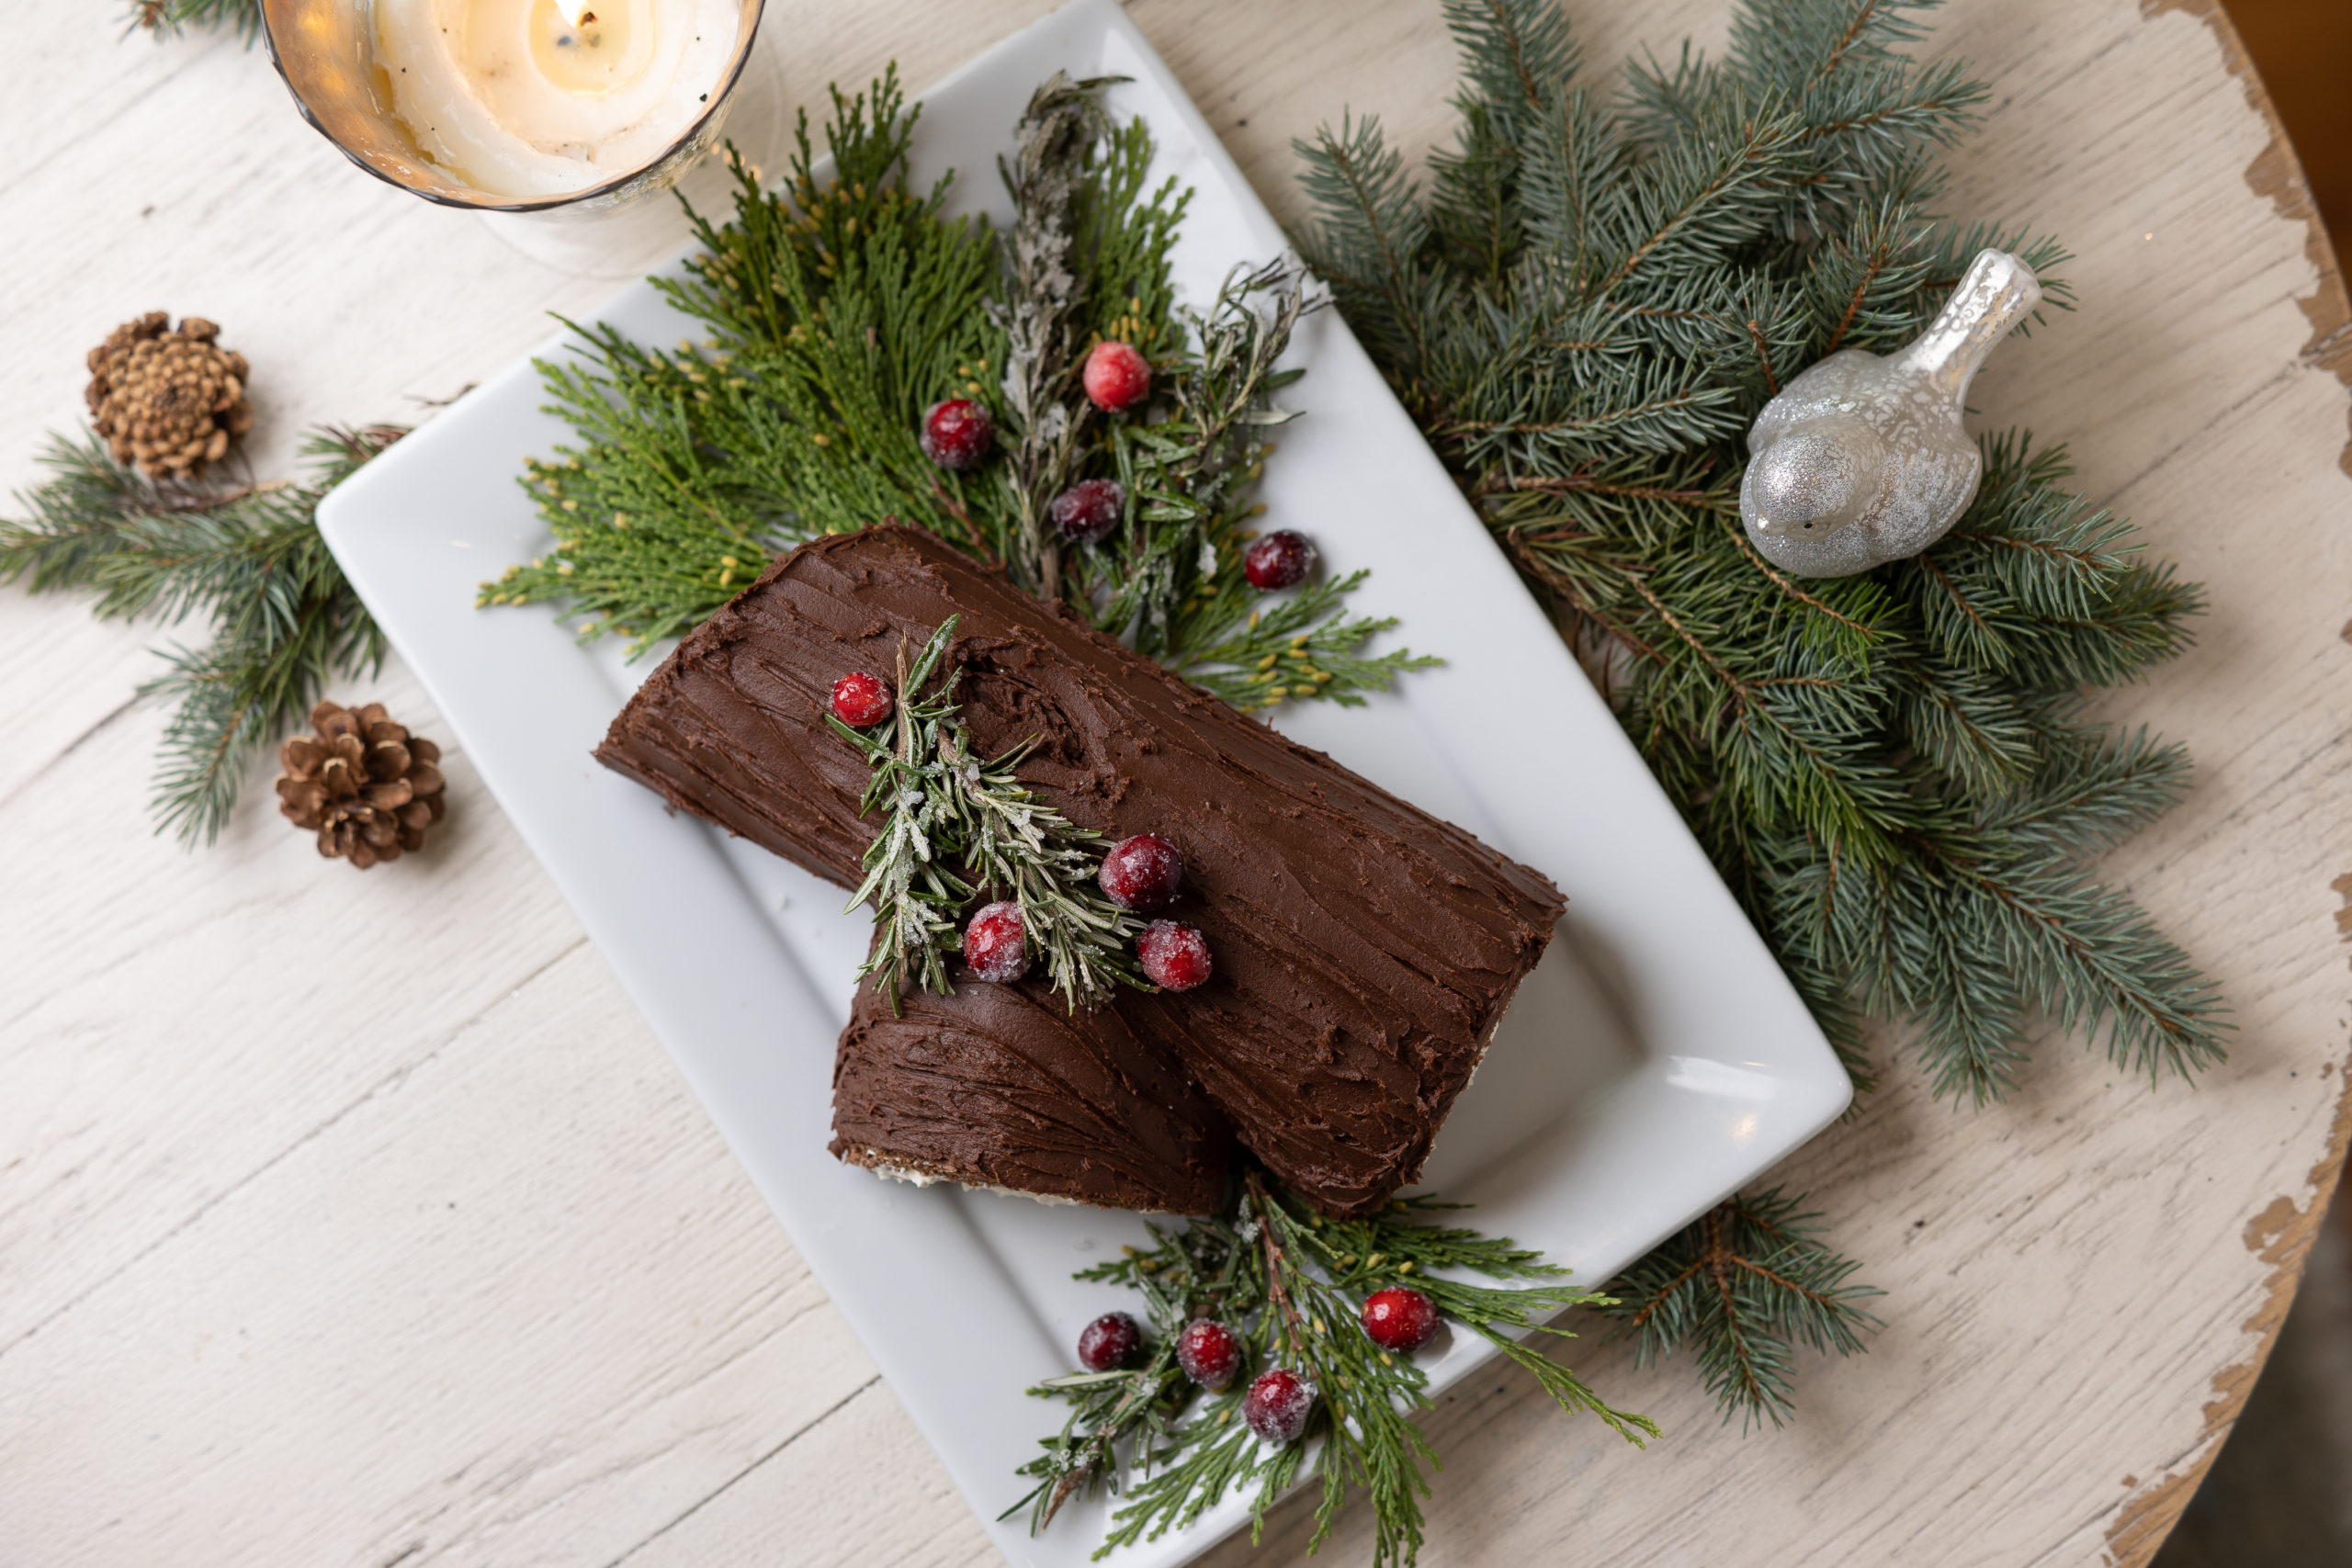
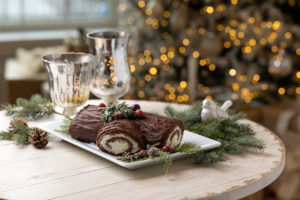
Yule Log / Buche de Noel
December 19, 2022
: 10
: Medium
Learn step by step how to make this classic traditional Christmas cake - the Yule Log or Buche de Noel. The whipped filling is rolled into a chocolate sponge and finished with a traditional buttercream. Decorated to resemble a branch with the infamous spiral center. Sure to wow your holiday guests!
Ingredients
- For the Cake:
- 1/2 cup all purpose flour
- 1/4 cup unsweetened cocoa powder
- 1/4 teaspoon kosher salt
- 6 eggs - separated
- 3/4 cup granulated sugar
- For the Filling:
- 1 1/4 cups heavy cream
- 1/4 powder sugar
- 1 1/2 teaspoons vanilla
- Pinch of kosher salt
- For Frosting:
- 1 stick of room temperature butter
- 1 1/2 cups powder sugar
- 5 tablespoons unsweetened cocoa powder
- 4 tablespoons heavy cream
- 1 teaspoon vanilla
- Pinch of kosher salt
Directions
- Step 1 Preheat oven to 350 degrees.
- Step 2 Spray a baking sheet with non-stick spray and line with parchment paper. Spray parchment paper with non-stick spray as well.
- Step 3 Next, in a bowl sift flour, cocoa powder, and salt. Set aside.
- Step 4 Separate eggs into two bowls – whites in one, yolks in another. In a mixer whip egg whites until they start to form soft peaks.
- Step 5 Add 1/4 cup of granulated sugar to egg whites a little at a time.
- Step 6 Whip until you have stiff peaks.
- Step 7 Take the 6 egg yolks and whip them until thick. You will want a ribbon consistency when you lift the beater up. Add 1/2 cup of granulated sugar and mix until they turn a pale light yellow color.
- Step 8 Now add dry ingredients to egg yolks and blend together.
- Step 9 Once combined, gently fold in egg whites. Do this in three batches – not all at once. You want to cut and fold them in. Do not mix. Mixing will deflate your egg whites.
- Step 10 Pour batter onto lined baking sheet.
- Step 11 With an off-set spatula, lightly spread the batter on the baking sheet.
- Step 12 Bake cake for 12 to 14 minutes. (You want to make sure you don’t overbake cake or it will become dry and may crack when rolling it out).
- Step 13 Gently see if cake springs back when you touch it. If so, it is done. Remove from oven and let it cool for a few minutes. You want the cake to be warm when you roll it.
- Step 14 Lay a clean kitchen towel vertical to you on surface. While cake is resting, dust the towel with powder sugar. This will help as you roll the cake into a log.
- Step 15 When you see cake start pulling away from the sides of the pan you are ready to roll. You may need to use an off-set spatula to help any areas that still may be attached.
- Step 16 In one quick motion, flip cake onto towel.
- Step 17 Peel back parchment paper slowly.
- Step 18 Starting on the short end near you, use the towel to lightly roll the cake into a log. Once rolled up set aside and let cool for an hour.
- Step 19 To make filling add heaving cream to a mixing bowl and beat. Slowly add powder sugar, salt and vanilla. Beat together until medium peaks form. Keep refrigerated until ready to fill cake.
- Step 20 Once cake is completely cooled, slowly unroll cake. Leave it on towel.
- Step 21 Spread filling with off-set spatula evenly onto cake.
- Step 22 Using towel, roll it up tightly and place it back on baking sheet.
- Step 23 Put cake in refrigerator for at least 2 hours.
- Step 24 To make frosting beat butter, powder sugar, cocoa powder together until combined. Add vanilla, salt, and heavy cream. Beat until creamy.
- Step 25 Remove cake from refrigerator and remove towel.
- Step 26 Trim ends to give log a clean spiral look.
- Step 27 Place cake on serving dish.
- Step 28 Cut a diagonal wedge off one end of cake and place it along cake to give it the appearance of a branch growing off a log.
- Step 29 Frost cake with buttercream and decorate with sugared rosemary sprigs and sugared cranberries.
- Step 30 Cream refrigerated until serving.
- Step 31 Enjoy!